Blog post 1
Interactive media, which can also be known as interactive multimedia, is any media that responds to user input. There are many different types of interactive media such as:
- Apps
- Games
- Virtual reality
- Social media
- Art
- Cinema
- Application software
- Persuasive games
- Interactive video
- Publication
- Advertising
- Theme parks
And many more.
Interactive media began to replace the model of one-way communication for example, the internet in 1990.
Firstly, I would like to mention the traditional type of media which is a broadcast TV and film. Out of all the others that are around this is possibly the oldest form, alongside newspaper articles and so forth. Even though it is under interactive media it’s not considered as interactive. Some may consider it as interactive because you have to use a remote to get the whole system to work but the reason for it not being interactive is because all you do is watch it. Although, there are a few films on Netflix where you can interact with it for example, minecraft story mode and the main one, which is called Black mirror: Bandersnatch. This is considered as interactive because the story is about a programmer trapped within his game and you can choose what happens next in his adventure.
Another type of media that is interactive is apps. Apps is a more recent and now probably the most popular version of media as many people in the world have a phone and most phones includes apps. The reason this is considered as an interactive media is because if you press on a game after it’s been downloaded from the app store, it takes you to the game (opens it) straight away kind of like a short cut or a QR code. You use a QR code to take you somewhere without having to use a search engine, that is basically what an app does. It’s a good use of interactive media because it’s very popular and entertains you.
Also, the internet is considered as a type of interactive media because it’s similar to apps because you have to interact with it to work it, for example you have to press links or type a website you need such as youtube or if I am doing work at home I will have to type in the college website to access it. This is a useful piece of media because you can practically find any piece of information or site your looking for just by simply interacting with the computer. For this reason, the internet is actually very useful peice of media. One last thing is you can play games online too, which makes the internet interactive.
An example of a practice interactive media website that I have made (This is part of my primary research): https://40083052.wixsite.com/mysite
When I made this interactive website I though it was quite easy but I think when I’m making my own and adding picture to it it will get a bit more complex, though, I did enjoy making this website.
Additionally, a common type of interactive media is games. This type of interactive media, especially video games, have been around since the 1970’s and have been very popular since. The reason games are considered as interactive is because you have to control and get involved with the game to work for example platform games including Mario, Sports games football, survival games like minecraft and many more. With these type of games you mainly control it with a controller remote. You can also have access to multiple kinds of games online that you can control like fire boy and water girl.
This is an example of an interactive game that I have made using construct (Part of my primary research) : http://localhost:50000/
I found making this game quite difficult even following the instructions. However, I did it again after I had a practice go and it seemed easier to get my head around but I don’t think a game will be my main idea because in general I think it will be quite complex and I don’t have access to it at home because it is to expensive. Also, if you would like to have a go at this game just simply press the link and your character is Pacman. To get away from the ghosts you use the arrows on the keyboard. I hope you enjoy it.
Moreover, Virtual reality is considered as a type of interactive media because the concept of it is to make you feel like your stuck inside the machine or game etc. A most recent virtual reality device is a headset that is used for video games. The idea of the headset is that you are meant to get the real feel of life (like it’s happening to you in reality) in a game and control what happens for example, now, medical student nurses are using virtual reality headsets to practice for surgery this can work because when they place the headset over their eyes they will be able to see what they’re operating on where in reality there actually won’t be anything there other than a manikin. For this reason Virtual reality is quite a useful peice of interactive media as it can be used for education purposes.
There are many others types of interactive media such as art, publication and digital posters but these aren’t really considered as an interactive media other than art (or digital art), you can do art on Paint and Photoshop this makes it interactive because you have to edit pictures by using the mouse.
Aswell as types of media there are also different forms of media. The different forms of media are things like photographs, music files, game files and video files and so forth. These forms are not considered as an interactive media because you don’t control it as they are already set up for you.
I have mentioned one previously but just a short brief of another form of media, which is a QR code. As I have mention previously, QR codes are basically just shortcuts that take you to a specific place to whatever it’s linked to such as a GIF, a website, a game or an interactive digital story. You can find QR codes anywhere in places like magazines, newspapers and ads on posters. I think QR codes are quite unique because they are like a surprise as you don’t know what hides behind them.

I made this QR code using https://www.the-qrcode-generator.com/
Before I made the QR code I had no idea how to actually make one. When we got told that you just copy and paste the web address onto the website to create it I was quite impressed, so I might use this as one of my ideas.
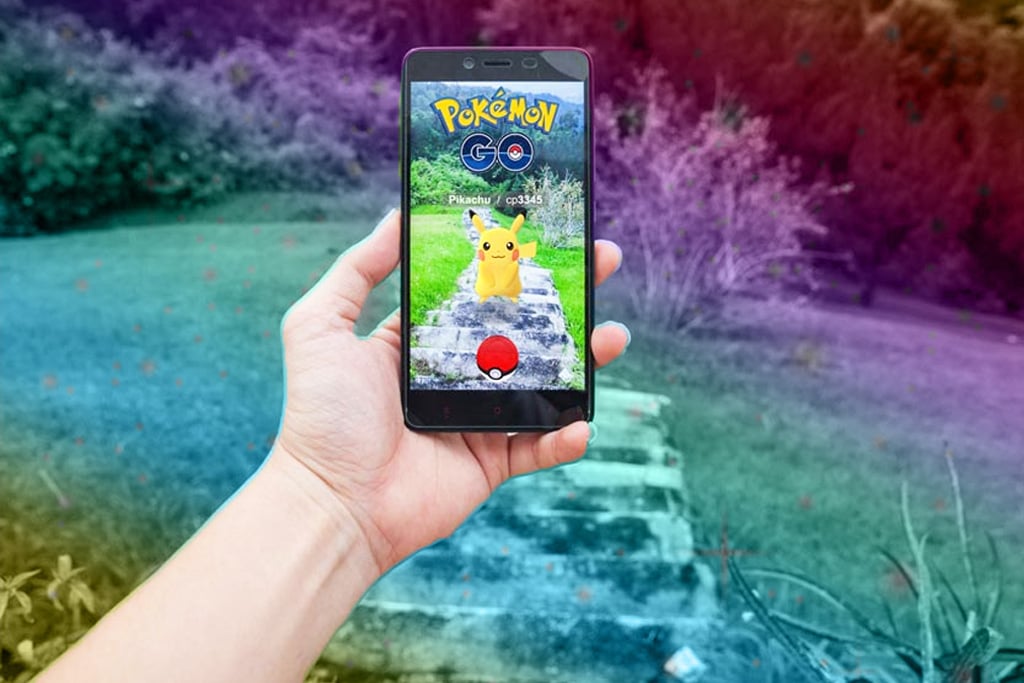
The theme fantasy can be linked to many different types of interactive media such as games. In games you can include fantasy characters such as orcs, elves, dragons and many more or it can be anything that you make up for example a dog with wings. Fantasy themed games doesn’t have to be the original things like fairies and unicorns as there are many games out there that don’t include them such as Pokemon go. Pokemon go is a fantasy mobile game, the reason why it is fantasy is because you collect the little characters from Pokemon, that are hidden around your town or city. They are not real but seem real as you have to be active to find them.
In conclusion, the types of interactive media that I am interested in doing is either a website or a game because they seem quite fun and interesting. Also, to which ever one I decide I think I will link it to a QR code so it directly takes you to the website or game and I really like the idea of the QR code aswell because you will not know what is behind it (like I said before).
I have learnt many things in this session such as information about different types of interactive medias and why they are considered as good or bad. Also, I decided which type of interactive media I would like to create for my project.
Blog Post 2
A possible idea for my interactive media project is to make a fantasy themed website based on a film I have watched called Bridge to Terabethia. It’s a film where a girl and a boy use their imagination to make the woods come to life.
I would like my website to include characters that I have either made up, ones from the film or fantasy characters that are from the internet and catch my eye. Also, I will write information about them and why they do or don’t belong to the forest. There will also be a short, made up story included on the website.

On the picture above I gathered a few images together from the film to show what the them of my possible idea is. For my idea, I think I am going to stick with the forest theme because I really like the colors
My other possible idea is to create a game involving elves and a dog combined with a dragon. I got the inspiration for the donkey with dragon wings character from shrek.


The picture above is screenshots from the game Leprechaun, this is what generated ideas for my game idea. Basically, this game is like Mario but using a leprechaun instead. The idea of using elves came from this game because they use leprechauns. However, the whole idea of how the game I have in mind is what I have created but just getting ideas from other fantasy games/films.
In this session I have thought about how I could include the theme of fantasy into possible ideas that I have in mind and how they could be a form of interactive media. I did this by gathering images of the internet from where I am generating my ideas from to show I understand how fantasy links to interactive media.
Final Ideas
I have come up with 2 final ideas for my unit 7 project.
My first initial idea is to create a website on Wix and link it to a QR code. The website will be inspired from a fantasy film that I have watched called ‘Bridge to Terabethia’. If you didn’t know what this film is about its where two teenagers create an imaginary world (using their imagination) where the forest comes to life. On the website it will include characters that I have created or ones that already exist, information about them and a short story that I am going to make up.
The second idea is to create a game involving elves and a dog combined with a dragon (dog-dragon). Also, it will include many elves running across the screen. You’ll be controlling the brightly colored elf and will have to try and run away from the tennis balls that will be dropped out of the dog-dragons mouth. If the ball lands on you, you will die. To create this game, I will be using a software called construct two but the reason to why this isn’t my initial idea is because I can’t afford construct 2. This is important as I would like to complete some of my work outside of college as well as in the half term because there won’t be enough time to complete all of it in college.
My final idea is to link a fantasy website and a game (based around the website) then I am going to link it to a QR code that will be on a poster. This is something I would like to do in the future if we were to make an interactive product again but it’s not really my main idea because I think it would be too hard and take up a lot of time and I need to put this into consideration because I have other projects to do for other subjects.Overall, the method of innovation that I a using is the symbiotic idea. This method is where multiple ideas are combined but your using different elements of each. I like this method because it gives you a range of different ideas that you can use, so your not just stuck on one thing.
Overall, the method of innovation that I am using is the symbiotic idea. This method is where multiple ideas are combined but your using different elements of each. I like this method because it means you can use ideas that gave you inspiration and then gather them all up together to make one idea. This is a helpful method because it stops you from being stuck on one thing.
Blog post 4 – Planning
Project management chart
As part of my planning I completed a project management chart. We first got shown an example of what one looks like.

The picture above is an example and we can use this as a template for when we complete ours.
After we got shown am example I then created my own. The first thing I did was change the subheadings (On the left hand side column) to planning research, design and develop and then I made my own deadlines, so it will help me keep on track with my work.
Here is my project management chart:

The picture above is a screenshot of my project management chart. You can probably see that it isn’t completed fully yet, that’s because I might want to change it as I go along for example, I might need to subtract a square and place it on a different row as ‘Done’ because I might’ve completed it beforehand (I will show my evidence if I do edit my project management chart). Aswell as the actual deadline itself, I have included my own deadlines of when I want a certain thing to be finished such as the planning or designing.
A project management chart is really good to use because it gives and idea of how long you have left on a certain topic. Whether that be research, Planning or design. It helps you from avoiding stress working at the last minute because stress isn’t good for your health.
Work Flow
After I finished my project management chart, I then hand-drawn a flow diagram. A flow diagram is good to use when making a product because it shows what order to complete your work in.
I got shown an example of how it works:

I used the example above to then create my own of what I am going to do to get to my final product.

my flow diagram.
The flow diagram will help me to not make many mistakes because you can’t just skip straight to the develop section without actually doing all the things that need to be done before (which are the most important part) such as designing research and planning ideas for a fantasy website. It’s important to collect ideas together first in case you need to change a few bits before making it.
In these two sessions I have learnt different ways of managing time and how I can create my own way of managing time by using a flow chart and a project management chart. I find these ways quite useful as they have stopped me from stressing over my work. Although, the two different ways of planning are not the same because a management chart is managing time left on a certain subject, where as a flow chart is showing what order to complete your things in but the thing that they have in common is that they help you keep on track with your work.
Blog post 5 – Design Process
Moodboard
Once I had completed my project chart and flow diagram, I then created a mood board to start my designing. A moodboard is where you gather all your color schemes, fonts and characters (to get inspiration from) onto one page. This will help for when I am developing my website because I will be able to visualize my ideas, especially when I am making my mock screenshot.
Below is a screenshot of what I searched to find images for my moodboard:

The reason to why I typed in ‘Fantasy creatures’ then pressed on ‘Forest’ is because my theme is based around a forest (I have already said this in my ideas) and I wanted my mood board to kind of look like a forest with all the different colors and characters I use.
This is my moodboard:

On my moodboard you can see that I have included colors, characters and text of what I think link to the theme fantasy. Also colors I want to include on my website.
I have learnt that making a mood-board can help collect ideas together of colors and texts you might want to use on your website. A mood board is good because it stops you from your brain going blank and not being able to think of ideas.
Management chart 2 – Changes
There are a few changes I have made to my moodboard.
The first change that I made was highlighting the flow diagram box green so I knew I had done it. ( You will see this change by looking back at my very first chart).
Secondly, I added a box to say that I created a moodboard because I completely forgot to include that.
Another thing that I have included is a deadline for when I would like the designing to be completed for so then I have plenty of time to develop my website. To make sure I had enough time to make my website I moved one of the yellow boxes to the left because I realized I will be able to do most of it in one work as I can complete work outside of college.

The picture above is a screenshot of the changes I have made.
You can also see that I have added an extra block in called ‘Develop’ but I will fill what I have done in per week (on the develop section) once I’ve finished a certain task.
Using my project management chart, I have figured that my website idea might just go to plan. So far, I have completed the tasks I’ve set my self on time or earlier than the deadline I’ve made.
Mock Screenshot

The picture above is a mock screenshot of my homepage that is going to be on the website I am creating. As you can see I have named the website ‘The magical world of silvis’, your probably wondering where did silvis come from? Does it mean anything?. Well, at first I struggled to come up with a name for my website. I tried to find other websites similar to my idea but the names didn’t inspire me but when I was researching this I found a website of how you can generate name ideas for your fantasy website.
Here is the website link: https://www.fantasynamegenerators.com/
If you click on the link at the top of the page it will give you multiple choice of what you would like to generate names for. As it is for my website I obviously clicked fantasy names and then it will give you loads of choices of what your fantasy name is for I tried a majority of them out and they gave me loads of names. Although, I wasn’t t keen on them for my website name but I thought I could go back to it later for my character names.
However, this did give me inspiration to use google translate. The first thing to come to my head was woods. So I decided to translate woods into Latin because Latin is kind of like old English words. When I generated woods to Latin it came up with silvis and I quite liked the look of that. I already had an idea that I wanted my website to be called ‘The magical world of (Something)’ but instead of using the words woods I wanted it too have a more fantasia feel.
My website is going to be targeted towards children but anyone that is into fantasy and magic. Also for people who have a great imagination.
I am proud of my outcome of the mock screen-shot of my homepage that I’ve drawn, it looks almost like an exact image even though it is just a sketch.
In conclusion for this section, I have learnt different ways of how to name my own website (I couldn’t think of any names) , by doing plenty of research.
Script/Mind-map
A script for a website is basically what information you would like to include for each section. I have done my script in a mind-map form.
Here is my script:

On the picture above you can probably see that I haven’t included much information because it’s just for me to get ideas and to look back on if I get stuck for example; the short story section I have a story in mind but I have only included sentence starters because I find it difficult to come up with ideas when looking at sentence starters.
Also, on the ‘Creatures lair’ section I haven’t included the information just a short brief of what I wanted to write about when talking about each character, as you will see all the information on my final product.
My Characters of my own.
As I want at least two characters of my own on my website, I have done some sketches of a few ideas I had in mind.
These are my sketches:

On the picture above you can see I have drawn an enemy aswell as an elf. The enemy (If you didn’t already know) a snake has a poisoness hat that kills all the good creatures . The elf has a shield that protects him/friends from the enemy. When I come to creating these I will either do them from scratch on paper but I think I am going to draw them on paint because I have excess to that at home.
I got inspiration for the elf from when I search ‘Cartoon fantasy elves’ and this picture came up and that is where I got the inspiration from.

If you look at the picture I have got inspiration from the shield except I have changed the color slightly.

For the snake I got inspiration from the film ‘The Jungle book’ because there is an evil snake called Kaa, who is known for his hypnotic eyes to lead them to his mouth to eat.
This is my final design of my characters:

The picture above shows you how I have changed the design of the snakes tail and colors and the elf’s’ ‘Dress’ color is green to match the theme of my website being based around woods. Also, I have annotated it a bit more.
Below are pictures of characters that aren’t my own but ones that already exist:


The reason that I have chosen these characters is because they remind me of some characters from Bridge to Terabethia. I am not giving the names away of them yet because it will ruin it for you as all this information will be on the website.
Once I had collected all my characters together I then started to draw my own characters digitally on paint.NET to make them look more realistic for the website I am going to make. I have chosen to use Paint.Net because I have access to this at home.
Here is my elf:

As you can see I have used many different colors on my elf. The reason to why I have decided to use spray paint on the dress, shoes and ‘Shield’ is because I want it to look like moss and give the elf a more ‘Forest feel’ (to make it look like it belongs in the forest). I am very pleased with the outcome of my drawing as it looks like the picture I hand-drawn.
Below are screenshots of the different tools I used that are available on paint.NET:


After I completed the elf I then moved on to draw the snake.
Here is my snake:

Underneath is some screenshots of the different tools I have used:


As you can probably imagine it took my a couple of goes to get the snake just how I wanted because of the curves that are in the design. However, it didn’t turn out how I was expecting it to but I am still very pleased with my final outcome.
Overall, I am really happy with all the designing skills I have completed because I have managed to finish most of them on time or early as planned. Also, it is going to make me feel less stressed knowing that I have completed and now I can start developing my website and including all the things I have collected together onto it.
Progress chart 3
Now that I have completed the designing section, Which i completed by the deadline I made because I have been doing work outside of college, I highlighted all the boxes (in the design section) step by step of when I finished that task.

Looking at the screenshot above you can see I am gradually starting to fill the develop section in because I now have ideas in my head of when I want to complete tasks for the making of my website. I will probably keep adding things and removing things as I go along depending what I have already done and not done.
I am really pleased with keeping on track with my progress chart and because of this I now feel less stress and can kind of take time on developing my website without thinking that I haven’t got enough time left.
Blog Post 6 – Developing
Now I have finished all my planning and designing I can now start creating my website. During the developing of my website I will show different screenshots of the steps to how I made my website.
The first thing I need to do is actually choose a design/layout. To do this I signed into my wix account, then I clicked on the link where it says ‘My sites’. Once I did that I had to click ‘Create new site’.

After finishing this step it opens to a page where it gives you multiple options of what you want to build your site for. As none of them where for me I clicked ‘Other’ which lead me to another page where you could get wix to create your site for you or where you can design or choose your own.


When I saw these two options, I explored them both and I preferred the one on the right because it gave you more options of templates. There were many options to chose from and I was quite overwhelmed with how many , it was difficult to choose. Therefore, I decided to look at the blank templates (on the left hand side of the screen). The picture below shows the different layouts that you get given for a blank template:

There are only 7 including the starting from scratch, even though on the other options you can edit and delete all the layout and start from scratch aswell. I found this way much easier to chose from as they are simple designs. My attention was drawn to the first layout the most, which is the on I have chosen. When I clicked on the design I deleted everything apart from the bar at the top where it says home etc.
Below is what the screen looks like once deleting everything:

Once I had my home page all set out I then started editing the homepage by adding a background, changing the heading on the bar and so forth (you can see what I am going to include on my mock screen shot that I drew previously) . Firstly, I started with the background. To import a background you add the second rectangle icon that is on the left hand side of the screen and because I like some of the ones that are provided by wix I didn’t need to import a picture from my gallery. These are a few option I can chose from:

Out of all the choices I have decided on the second one because I think it gives of a more magical feel to my website. After that I edited the names of my different pages that I would like. I completed this by double clicking on the ‘Home’ and then it come up with what is shown below. Then you simply just change the names to what you want them to be.

One thing that went wrong with this step is that I wanted to change the shade of the box to a light blue but for some reason it wouldn’t allow me to do that even though I managed to do it in my practice round (as shown in my primary research). Also, I am not to sure what text I used for this section as I used the one that was already on it before I changed the name.
After that I included a title for my website, which is the ‘Magical world of silvis’. To choose a style of text you press the little ‘+’ icon on the left of the screen and it gives you multiple choices. The reason I chose the font ‘Libre baskerville’ is not only does it stand out but it also looks a bit magical.
Here are a couple of screenshots of the previous steps:


Following that step I then completed my homepage by adding images and symbols and texts. Below are quite a few screenshots with explanations of how I imported them specific things.

Firstly, to import an image that I wanted as part of my homepage, I pressed the icon (as shown in the image) then pressed image because that is what I wanted to include. After that I had to press ‘Image uploads’ which you cam see highlighted in blue above. My image was already from a previous ‘Practice’ website I made. I kept with this image because it really appealed to me and it links to the theme fantasy. To add this to the page you simply press ‘Add to page’. If you want to resize the photo you just drag it by the corner as you would do on word.

Once completing that step I then moved onto adding my heart symbol (shown in my mock screenshot). The steps are all similar for wanting to import things, you just have to press on the title of which you want. For example:


When I clicked the heart shape I then had to move it to the center of page as that is where I wanted it. It wasn’t quite big enough to add text inside so I also had to resize the shape. Then I needed to change the color to more of a lilac, I used a color that already existed but I did experiment with the colors making different shades of purple. To have done this I pressed the icon ‘+’ that is on the colors on the right had screen then the box that appears is the one on the left hand screen (as shown on the screenshot above). The reason that I chose a lilac color is because it matches with this background colors and the title of my website.
Furthermore, I wanted to add text to the inside of the shape. It is exactly the same as the last step just you have to press ‘text’. For the inside of the shape the font I am using is Tahoma because it really stands out and this is good because it is going to be in the middle of the page. Then I moved onto including the tab at the bottom of the page that will say ‘FIND OUT MORE’, which will link you to the ‘About’.
The following screenshot is how to add an interactive button:


I had to move the box to the place I wanted it to be. To change what goes inside the box and where it links to you have to double click it and a box will appear to edit this information.
So far this is what the home page looks like:

The blue background does animate.
Finally, I got round to filling in the about section. When you first click onto about the page has a white box on it from previous template, so I had to delete all of that. Afterwards, I then made the word ‘About’ and then included a a background color for this page and the other pages on my website. The type of font I used for the subheadings of each page is called ‘Monotype baskerville’ the reason being is because I think it belongs to the fantasy theme. Also, the text I used for the paragraph is ‘Basic’ because it is easy to read.
Here is the about page :

The reason I have scribbled over some of the paragraph is because I want it to be a surprise for when you visit my final website design because it will be behind a QR code. Also, you can probably see that I have added in another page ‘A short story’ this is because I didn’t realize it was missing until I did the about page.
So far I am really proud of my website as it has turned how I was expecting it to.
Progress chart 4
I would now like to talk about changes I have made to my progress chart, I have moved a few things across because I have many other things to complete in other subjects, so I accidentally ran out of track.
These are the changes I have made:

What have I moved?
This things that I have moved is ‘To fill in the about section’ and the ‘Insert characters section’ the reason I have moved these is because last week I had other work to complete from other lessons, so I didn’t want to stress myself out if I hadn’t completed it.
What have I added?
I have added comments such as complete short story, fill in contact information, test the website out and also a deadline for the website to be completed the week before the actual deadline. I am positive that I will definetley complete my website because I have a lot of free time over this February half term.
Next step
Before I moved on to the next page, I changed the color of the backgrounds on each sections so they’re all the same. Then I imported the images of my creatures onto their page and wrote a bit of information about them and why they are good or evil to the woods. If you can’t remember how I imported these images you can look back at previous steps that shows how I did it.
This is a little sneak peak of what my creatures lair page is going to look like:

How did I come up with the creatures names?
As I went along writing my description for each character, I was finding it hard to come up with group names as certain creatures are in little army group (like the film Bridge to terabethia). So, how I did this was using my own real name (Millie Buckley) and my dog’s name, which is Douglas. All I did was scramble up the words to try and make them look like names.Below is a picture showing you what I did:

As I was designing the page I had to change the layout of the previous screenshot a bit because I couldn’t fit all the text and the images on into a tiny space but you will see this when you look at my final website.
The type of font that I have used is called ‘Basic’ because it is easy to read and makes the pages look neat.
Moreover, the page I moved onto was obviously ‘A SHORT STORY’. Like I have mentioned before, the short story isn’t quite a story it just tells you a bit about how and when the world came to life, a bit like an overview.
I have finally completed my whole website. Just to mention the contact page it’s their for show but if the website was real then obviously you can contact directly using that box.

The last thing I needed to do was a quick test of the overall website to see if it works. I couldn’t figure out how to record the screen, so I took a picture of me testing it out.

Final project chart
Here is the link to my completed project chart
When you click the link you will be able to see that I have moved a few things backwards as I have finished it earlier than I expected to. I also highlighted boxes green of what I have completed. Aswell as that you will see the comments for what things I wanted to complete on certain weeks.
The final and finished version
Do you want to learn more about the beauty of Silvis? Then get your scanner out:

The first version of my QR code went slightly wrong with the layout as the layout was made for a website but when you looked at it on a phone it was all over the place. I managed to figure out how to turn the layout suitable for a phone, so I could still use the QR code.
At the top right hand of the screen there is two icons, which mean a website design or a mobile design. You can see this highlighted in the picture below. Then all I had to do was move the text and images around to make it perfect for a phone design.

If you don’t have access to a QR code scanner but you still want to find out more about ‘The Magical world of Silvis’ then don’t worry because here is the link to my website: https://40083052.wixsite.com/mysite-1
I have double checked the QR code and the website link to make sure they work probably and they do.
I hope you enjoy!
Evaluation
In the making of my website I have learnt how to actually make it such as including , shapes, fonts and images, which I had no idea how to do that before hand. I have also learnt how to make a website interactive by including buttons, that take you to a certain page. Throughout this process of making a website I have found it hard at times because a certain image wouldn’t stay in the place I put it and the text was awkward to move about. However, the vast majority of it was easy to use once you had a practice at it first.
During this project I have learnt many different skills for instance, how to make interactive games and how a website can be made to be interactive. Also, at the start I learnt how different types of media are considered as interactive and why others aren’t.
If I had more time I would improve a few things on my website such as adding more detail to the characters, drawing a few more of my own and maybe include another thing on the front page like add a GIF. Also, I definitely would have added more pages if I was 99% confident I’d finished it on time. One more thing that I would improve on is probably linking another interactive media type onto my website such as a game, I was thinking of doing this for my 3rd idea but I wasn’t so sure I would have enough time.
The thing that I wasn’t happy about was that I had to change the layout to make it suitable for a mobile phone because I wanted to use a QR code. However, it turned out to be a simple task as all I needed to do was move images and text around to where it looked best.
Overall, when I first heard about this project I wasn’t to keen on it and it made me panic a bit because I was struggling to come up with ideas. As I went along, after figuring out a few ideas, I was really enjoying it and now would like to improve my website because I am really happy with the final outcome. I hope you like my website too!
