My final major animation

In today’s lesson I have started to plan for my final animation.

My final animation is going to be a stop motion using Lego friends characters, I am using Matthew and Mia.

The story of my animation is that Matthew and Mia meet up at a cafe and Matthew sees a drink that is already at a table so he and Mia goes to that table and even though the drink is already half empty Matthew wants to try it, so he goes and grabs it of the table. Then before Mia sits down she notices that there is a new flavor of strawberry milkshake so she gets one of them and a chocolate cupcake and sits down back at the table with Mathew. Once they have finished they put there cups in the sink and wave bye to each other and leave the cafe.

The video below is where I got my inspiration from to do my stop motion animation. I chose this kind of animation because I have the most resources at home to complete it, which is useful. Another reason I chose this animation is because when I was younger I used to play with Lego many times and still do occasionally so I liked the idea of using Lego for my animation.

This is the one I found from you tube.

Resources for my animation

Lego friend characters Mathew and Mia.

The Lego friends cafe set.

The app on my phone called I can animate lite.

Bluetac to stand my phone in the same position.

Lego Characters.
Lego set.

Planning

As you can see below I have a drawn storyboard as part of my planning for my final major project.

This image has an empty alt attribute; its file name is image-18.png

The picture above was took as I was drawing my storyboard to give me a good visual idea for when I take the actual frames for the animation. This helped me to know if I needed to re-position my Lego figures so they end up at the right place on the set so it would flow in the final product.

In my opinion I have spent a bit too much time on my storyboard, although it has given me an approximate idea of how long my stop motion animation will last. I think that the animation will last for at least 1 minute.

However, once I completed my storyboard I realized how many frames I am going to have to take but I do have about 2 weeks left to make my final project which I think will be enough time to complete it.

Furthermore, on my story board I have drawn some of my set to get an idea of what position I should put my Lego figures, Mathew and Mia, in for when they walk, sit and eat but overall, I know that my storyboard will help me when it comes to taking the pictures for the making of my final major project.

Planning 2

The next part of my planning included practicing my animation before I take my frames for my actual animation. What I mean by this is that I moved some of the Lego figures in their positions by using the storyboard then if the scene didn’t look didn’t look quite right I could make a few changes to the storyboard. Although, when I practiced I didn’t feel like I needed to make changes to my storyboard therefore I didn’t.

Throughout the practicing I took some pictures of certain frames. This will also help for when I take the actual frames for the final animation.

Below are the pictures I took.

During the practicing it helped me get my head around what position to place the Lego figures to create a flowing pattern in the final product (so it looks like they are walking, sitting, standing etc.).

My completed animation

When I was planning my final animation I realized how tricky it was going to be to complete the whole project. Considering I had only 2 lessons left to complete this I decided to use the app “I can animate” instead of my original idea which was taking the pictures then turning into an animation on Photoshop.

This is the app I used on my phone.

As I was making my animation I tried following the sequence of the storyboard. However, I realised I didn’t include any camera angles on my storyboard but I was already halfway through and I didn’t have enough time to redo it all. So I just kept my phone in the same spot for the entire shots, to ensure this I placed a small amount of blue-tac on the desk and placed my phone on the edge of it so it wouldn’t lean forward.

The picture above is what the set up looked like although instead of the wires it would be a Lego set in front of the camera.

Below is a screenshot of the layout of ‘I can animate’.

This app was really good to use as it showed the previous frame that was took, which is useful for this kind of animation so I am happy that I chose to use this app because if I chose to use Photoshop I would have had to take many pictures on my camera and then they wouldn’t have flowed because I will have got the Lego figure (for example) in the wrong position and if this happened it would just look like a practice version not the real version. Also, if I chose to use Photoshop I think that it would’ve took me longer that 2 lessons to complete.

Issues I had whilst making my animation

In the making of my animation I experienced a few problems for example the Lego figures kept falling over. I fixed this issue by using blue-tac bottom of the Lego figures. Moreover, as I was in the process of the sitting down frame Mathew and Mia kept falling over especially Mathew when Mia was walking to get her milkshake (She had to walk past Mathew who was sitting down at this point.) So because of this I also stuck blue-tac on their bottoms so they would stay in the place I wanted them to stay.

The picture below shows this situation.

Improvements

My animation went according to plan from my initial idea, I just added a few bits to it as well such as Mia getting a milkshake and cupcake and consuming them.

Although, I think I could make some improvements such as I forgot to include camera movements into my storyboard but I was already halfway through therefore if I had more time I would include them into my storyboard then use them for my animation so I am able to focus on one Lego character whilst the other moves somewhere else.

Another improvement I would like to make next time is add more frames and more of a story to it and in my story board I included speech bubbles but once I completed my animation on “I can animate” I realised that you can’t add text on the top so if I had more time I would reconsider using Photoshop to create my animation.

Overall, I think I have done a good job on my stop motion considering that I only had a short amount of days to create and plan it.

My final animation

Primary and Secondary

Primary

I have learnt how to collect research through primary research. The benefit of primary research is that the data has been collected personally either by doing surveys, interviews or observations. Also, primary research is important when you have fresh, unused data to help determine how they should make their project.

For example in our case we did a practice survey about animations, to help decide what type of animation we should do for our project. We came up with some questions then shared it on our social media pages. However, some students did the questioner on word then printed it off and handed it out to their peers too fill in.

The image above is an example from my survey. The results can be shown in a pie chart (like mine) , bar chart or on a graph. My results show that out of the 18 people-who participated 61.11% of them enjoy the theme comedy the most therefore when I make my animation the theme will be comedy.

Another reason to why primary research is important is because you can’t just make something that you like, you need to make sure what other people enjoy watching and the survey will help you get ideas for your own animation.

What is the audience for primary research?

The audience for primary research is for anyone because you are collecting data from all ages anonymously or personally to ask their opinion on something or what they like etc. For example in a primary school you might collect data on what the students favorite animal is and then collect the data and place it in a pie chart or tally etc.

Secondary research

Secondary research, which can also be known as desk research, is a research method where you collect data that already exists. Examples of secondary research include Demographics, records and reference materials located in public or private libraries, newsletters, legal documents and Pamphlets etc.

If we were collecting information that already exists, for our animation then we would try to find out the top viewed animations and the star ratings of them.

An example of secondary research


The picture above is an example of secondary research. I’m not that keen on secondary research because it is more complex as you have to find research that already exists.

In this example on the picture I asked the search engine of what the ‘Most viewed animated movie’ is and it came up with many examples but I clicked on the one I have recently watched.

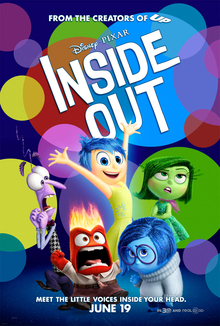
It told me that the star rating of Inside Out is 5 Stars which tells me that this is a popular film. Also the theme is comedy-drama/fantasy and because the theme is comedy it tells me that the film is funny which could be the reason to why people like this film. Therefore from this information that I have it will give me an idea to do an animation that is funny or a fantasy.

Image result for inside out

What is the target audience for secondary research?

In my opinion I think the target audience for secondary research is for teenagers or adults because it is more complex to work around as you have to go into great work to find the the data as the data from the internet or text book etc may not be specific and it could be old data not updated data.

Animation Practitioners

Fleischer Brothers

The Fleischer Brothers were american animators. One of the animations that they produced was Popeye in 1936. When they were creating PopEye they decided to do a hand drawn animation over a miniature background.

When you watch PopEye you can see the difference in style of the background for example at the start of the episode we watched in lesson, which was ‘Popeye the sailor meets Sindbad the sailor’, the background looked hand drawn like a normal animation then when the character walked into the cave it looked like a handmade miniature background.

This was the first time they did this type of animation unfortunately it didn’t progress because this animation of Popeye wasn’t popular.

Image result for popeye the sailor meets sindbad the sailor
The outside where the background looks drawn.
The inside where it looks like a model.
This is the episode we watched.
This is a video telling you a bit about how they made PopEye.

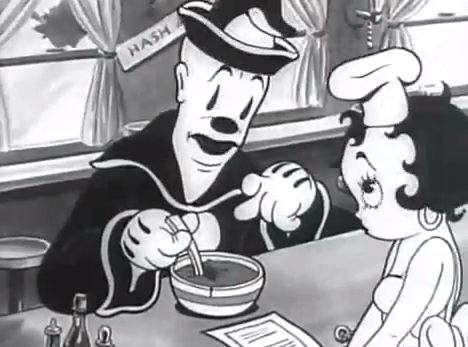
Other animation characters that the Fleischer Brothers have produced are Betty Boop, Koko the clown, Bimbo, Superman and obviously Popeye the sailor.

Image result for betty boop
Image result for superman
Image result for koko the clown

Nick Park

Nick Park is an English practitioner he is typically known for claymation such as Wallace and Gromit, Creature comforts and Shaun the sheep.

The first ever Wallace and Gromit ( Grand day out ) which was made in November 1989 is a handmade miniature background model to make it look like a real home and also to make sure the clay characters can fit on the set.

Nick Park practices many times with claymation by creating different characters such as Shaun the sheep. He has also been involved in the most recent film early man.

Before they filmed Wallace and Gromit A Grand Day out he did many screen testings. He did this to make sure you could see the characters on the film clearly before they produced it. Also when he did the screen testing he makes Wallace wave and walk around to make sure the lighting is good and he also does the test by using the candle that Wallace lights on the film.

This video shows the screen testing in Wallace and Gromit a grand day out.

Shaun the Sheep is another iconic film by Nick Park. For Shaun the sheep Nick Park focuses more on the facial expressions and trying out different movements on the sheep. In Shaun the Sheep Nick doesn’t use any actual speaking he just uses humming noise eg. like if your confused and go umm.

This is behind the scenes of one of Shaun the sheep movies.

In a lot of his films though Nick uses handmade miniature models like the Fleischer brothers do.

Other films that Nick has been a practitioner for are Chicken Run ( which in some ways is a bit like Wallace and Gromit ) , The Wrong Trousers , Early Man and Stage Fright etc.

Image result for Chicken Run
Image result for early man

Overall a practitioner is someone who practices in there job. In animation practitioners practice making new films using their style of animation and testing out new things like Nick Park when he experiments with different clay characters or models and how to move them about in different ways.

Simon Tofield

Simon Tofield created an animation called Simons cat which was made on the 4th March 2008. This type of animation is a 2D CGI animation. He often use uses Adobe Flash or TV paint animation. He also uses wacom cintqs or tablet to draw directly in to his computer. To create one second of Simons cat animation it takes between 12 and 25 drawings.

Simon had four cats: Jess, Maisy, Teddy and Hugh and their mischievous antics is what made him come up with the animation Simons cat. Simon has been doing animation from a young age, starting of with a flip book then using more modern animation techniques.

This is an example of Simons cat.

Animation Experiments

Experimenting different types of animation

I have experimented with different types of animation. The first one I looked at was how to draw a snail in case we wanted to do a hand-drawn/drawn stop motion. We watched a tutorial of David Burgess, who is a practitioner for Dream-works, draw the snail Turbo from the Dream-works movie Turbo.

This is my drawing of Turbo the snail at different angles because if we wanted to make it into a stop motion we need to make it look like it’s moving.

Then I hand-drew a snail onto a storyboard as a plan for if I wanted to make it into a stop motion. I drew my snail sliding down a wall trying to reach the tomato.

I enjoyed doing this drawn animation because it turned out how I wanted it too. Also it was easy because we copied a tutorial of David drawing the snail.

The second animation technique I experimented with was a digitally drawn stop motion animation. For this one I drew a cloud on paint and then making it into a GIF on Photoshop. I did this by drawing one single cloud on paint and moving it bit by bit so in the final product it looks like it is moving from one side of the screen to the other.

The painting.
This is creating the GIF onto Photoshop.
This is how you move it bit by bit.
This is my final product.

When I experimented with this I did enjoy it because it was easier than I thought it was going to be and I wouldn’t mind using this to do another animation in the future.

Also the other animation technique I have experimented with is stop motion using Lego figures/figures. To do this you take multiple pictures of the Lego figure/figures and move them in small steps to make it look like it is moving.

This is a story board of my plan for the GIF.
This was the final product.

Although this did take time because you need to take many pictures it was really fun to do because I quite like Lego and I think I am going to do this type of animation for my project.

Next I practiced with another digitally drawn animation because I wanted to see if I got more interested in it.

This is my

I firstly drew a pink balloon on paint.

This is an example of one of the balloons I drew.
These are all the images I drew paint.

Then I inserted all the digital drawings onto Photoshop to start making the GIF.

This is the final product of my GIF.

I made my balloon look like it was floating across the screen. However, I don’t think I will use this as my final project because it didn’t interest me and it was quite boring to do.

Another kind of animation I experimented with was using a website called “WeVideo”.

We experimented with this by using our story board drawing and placing the conversation over it.

For the conversation some people used their own voices with a friend or on their own but the majority of us used a website called note vibes which is where you can type speech in and change it into different accents and the speed of how fast you want it to speak.

This is how you use note vibes.

Then once you have saved the files you download them into audacity and separate them into different bits to make them flow. After you have done that on audacity you put the files on top of the story board panels to make the voice match with the pictures.

like this.

The final product looked like this (click the link below).

https://www.wevideo.com/view/1485527492

I enjoyed doing this kind of animation because you had to try and join the voices over the storyboard which was really fun to do but it was quite complex as you had too make sure the voice was linked the picture from the story board and you had to make the clips of the picture and the audacity sound shorter or longer. I don’t think I will use this for my final project because it takes up a lot of time.

The final experiment I did was using Maya which is a computer software. This is a type of digital animation.

To get used to this software I practiced making different shapes and moving them about.

This is my First experiment with Maya making different shapes.
This is my plan for my Maya animation.

Then we did a real practice animation using different shapes and making them animate on the screen. I used a sphere and made it looked like it was floating across the screen.

This is my animation on Maya.

I didn’t really enjoy this because it was frustrating and it kept deleting my work. Also it takes a while to get the final product as you have to move the shape in small steps and section them to different parts so the animation actually looks like it is moving.

In Conclusion

Overall for my final project I think I am going to use stop motion because it is the one I really enjoyed experimenting the most on. For my final project I am going to be using my Lego friends characters the ones that I am using are Matthew and Mia and I am going to make them walk to greet each other by waving then Matthew is going to sit down on the floor and I am going to make it look like he is drinking.

I am going to make my animation at least 5 minutes long and I am going to aim it towards children because of how I am using Lego friends. Also my theme is going to be family because it is a Lego animation.